-
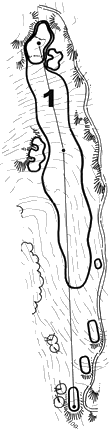
Hole #1
Birdsfoot Golf Club's starting hole has a generous landing area for the opening tee shot. Challenge the bunker on the left of the fairway to leave the best angle into the green, and be sure to take enough club for your uphill approach shot. -
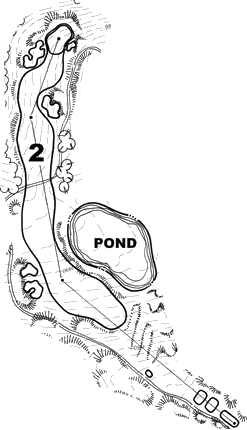
Hole #2
You must respect the pond on the inside of this sharp dogleg right Par 5. Play toward the fairway bunkers off the tee, and be careful with your layup on this 3-shotter. The cross bunker short of the green on the right is a good guide to either hit short of or try and carry if you have the length to go for it. -
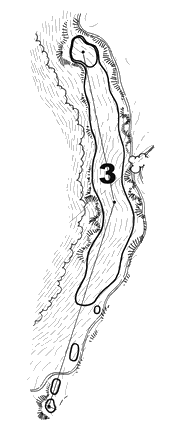
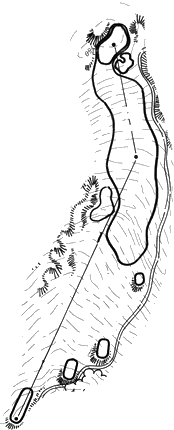
Hole #3
Dubbed the "Hombre", Hole No. 3 is one of the longest Par 4's on the course. Aim down the right side of this bunkerless hole and allow the natural terrain to feed the ball from right to left. The large subtle green is meant to hold approach shots from long irons or even fairway woods. -
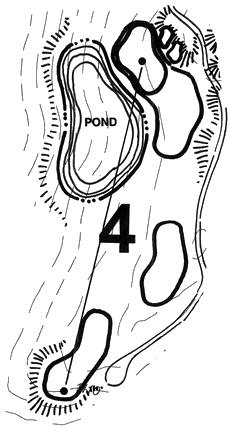
Hole #4
The shortest Par 3 out of the four, this beautiful little hole is guarded by a pond on the left and two bunkers on the right side of the green. You must hit an accurate tee shot to get close to the pin or you can bail-out short right and be faced with a difficult up-and-down. -
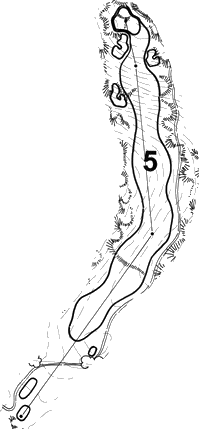
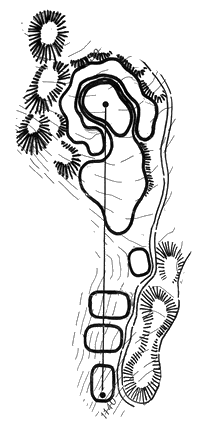
Hole #5
A good tee shot in the fairway is likely to reach the "speed slot" over the horizon of this landing area and roll an extra 20-30 yards. The rest of this long Par 5 is all uphill to a tricky 3-tiered green so pick your club wisely. -
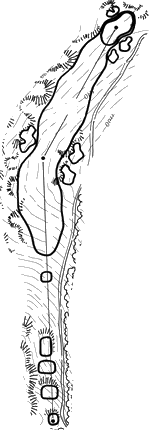
Hole #6
This short Par 4 is peppered with bunkers and grass depressions on both sides of the fairway. You can be conservative off the tee or, if you're hitting it well and can work the ball from left to right then it may be worth the risk to take a shot at driving the green. If you're off the mark though, you may be lucky to score a 4. -

Hole #7
A slight dogleg left, the preferred tee shot would be down the right side of the fairway. The uphill green is a wide target with good depth and a terrace separating the front half from the back, but don't be fooled by the greenside bunker on the left which is deceptively short of the putting surface. -

Hole #8
This is a fairly straightforward hole with the fairway divided down the middle by a long terrace creating a high side on the right and a lower side on the left. If you err to the right off the tee there's a good chance the slope will kick the ball back into the fairway. -
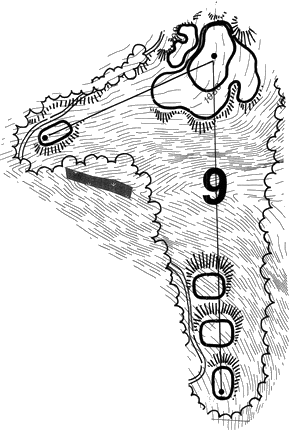
Hole #9
Lace up your spikes and grab enough club for this spectacular Par 3 finishing hole! Although the green is one of the largest on the course, but you MUST get over the large deep ravine first. -
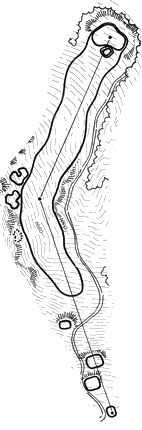
Hole #10
Challenge the bunker on the left side of the fairway to set up the best angle into the green. The long and narrow green is set in from left to right and depending on the pin placement coupled with the higher elevation could mean the difference between hitting one or two extra clubs. -
Hole #11
A bunker surrounds the entire green on this slightly uphill Par 3. There is a narrow opening in front allowing shots to run onto the putting surface, but if you do miss the green you'll be looking at making a sandy to save par. -
Hole #12
This strong dogleg right offers a dramatic downhill tee shot from the highest point on the course. There is a wide fairway, but aim down the left side or par could be even harder to achieve. A slope running laterally through the center of the green helps feed the ball to a back right pin. -

Hole #13
The first of the tree lined holes at Birdsfoot, this Par 5 requires accuracy from tee to green. The only bunker to avoid on this hole is right of the green, and it's always best to be putting uphill to any hole location. -
Hole #14
You need to hit it slightly left to right to fit your drive into the landing area framed by bunkers. The green is also bunkered to the right and left with a distinct bowl in the middle right of the putting surface that puts a premium the correct distance for all approach shots. -
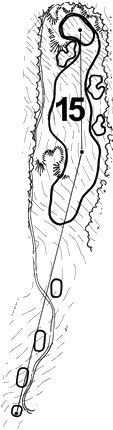
Hole #15
You don't need to overpower this hole. Get it in the fairway off the tee and leave yourself your favorite yardage into the green. -

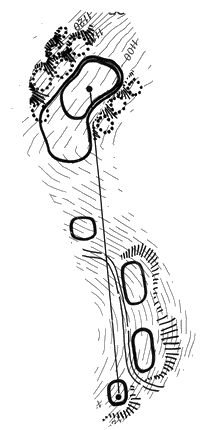
Hole #16
Of all the Par 5's, this one offers the best chance for an eagle. The right side of the fairway will leave you with the shortest distance to the green in two, but the hillside along the right hides the green tucked in behind it. If you play right of the cross bunkers in the 2nd landing area and take dead aim toward the green, you may end up putting for a three. -
Hole #17
The last Par 3 at Birdsfoot Golf Club is also one of the most striking with multiple grass depressions shaped into the slopes in front and behind the green. This long and shallow green is cut into the slope on an angle from left to right and demands that you hit the right club to find the putting surface. -
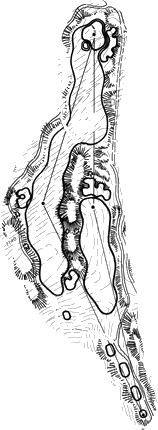
Hole #18
You have a choice to make with a split fairway on either side of the large undulating spine down the middle of the hole. The safe shot is down the right side, but you'll be left with a longer, blind 2nd shot into a demanding green. The riskier tee shot to the left side requires a longer carry and a slightly left-toright shot to hold the landing area. If you can successfully negotiate the fairway on the left, the slope of the fairway will carry the ball a few extra yards and leave a shorter shot and better angle in for the approach.